まずはdartレベルでページング処理を作成

こんな感じのページネーションをflutter webで作ることになりました。
無限スクロールのパッケージはたくさんありますが、上記の様なオーソドックスなパターンのは見当たらなかったので、自作します。
ソース
基本はgoogleのページネーションを参考にしています。
import 'dart:math';

class Pagination {
  // 一度に画面に表示できる最大のページ数
  static const max = 10;

  static int maxHalf() => (max / 2).floor();
  static int centerLeftDiff() => maxHalf() - 1;

  static List<int> pagination(int selectedPage, int pageMax) {
    if (pageMax < selectedPage) {
      throw Exception('selectedPage must be less than or equal to pageMax');
    }

    // 右の最大ページが決まれば1に到達するか10個までカウントする
    List<int> pagination = [];
    for (var i = rightMaxNumber(selectedPage, pageMax); i > 0; i--) {
      if (pagination.length == max) {
        break;
      }
      pagination.add(i);
    }

    // for文の条件を反転させればreverseしなくてもいいと思うが
    // そうなると最小値を求めないといけなくなる
    return pagination.reversed.toList();
  }

  static int rightMaxNumber(int selectedPage, int pageMax) {
    int rightMaxNumber = 0;

    // 今回の例で言うと6ページを境に動作が変わる
    if (selectedPage <= maxHalf() + 1) {
      rightMaxNumber = min(pageMax, max);
    } else {
      rightMaxNumber = min(selectedPage + maxHalf() - 1, pageMax);
    }

    return rightMaxNumber;
  }
}
テストコード
import 'package:flutter_test/flutter_test.dart';

import 'package:flutter2_practice/src/pagination/pagination.dart';

void main() {
  group('Pagination', () {
    test('rightMaxNumber', () {
      expect(Pagination.rightMaxNumber(1, 1), 1);
      expect(Pagination.rightMaxNumber(1, 10), 10);
      expect(Pagination.rightMaxNumber(1, 11), 10);
      expect(Pagination.rightMaxNumber(6, 6), 6);
      expect(Pagination.rightMaxNumber(6, 7), 7);
      expect(Pagination.rightMaxNumber(6, 10), 10);
      expect(Pagination.rightMaxNumber(6, 11), 10);

      expect(Pagination.rightMaxNumber(7, 7), 7);
      expect(Pagination.rightMaxNumber(7, 8), 8);
      expect(Pagination.rightMaxNumber(7, 10), 10);
      expect(Pagination.rightMaxNumber(7, 11), 11);
      expect(Pagination.rightMaxNumber(7, 100), 11);
    });

    test('pagination', () {
      expect(Pagination.pagination(1, 1), [1]);
      expect(Pagination.pagination(1, 3), [1, 2, 3]);
      expect(Pagination.pagination(1, 10), [1, 2, 3, 4, 5, 6, 7, 8, 9, 10]);
      expect(Pagination.pagination(1, 11), [1, 2, 3, 4, 5, 6, 7, 8, 9, 10]);

      expect(Pagination.pagination(6, 6), [1, 2, 3, 4, 5, 6]);
      expect(Pagination.pagination(6, 7), [1, 2, 3, 4, 5, 6, 7]);
      expect(Pagination.pagination(6, 10), [1, 2, 3, 4, 5, 6, 7, 8, 9, 10]);
      expect(Pagination.pagination(6, 11), [1, 2, 3, 4, 5, 6, 7, 8, 9, 10]);

      expect(Pagination.pagination(7, 7), [1, 2, 3, 4, 5, 6, 7]);
      expect(Pagination.pagination(7, 8), [1, 2, 3, 4, 5, 6, 7, 8]);
      expect(Pagination.pagination(7, 10), [1, 2, 3, 4, 5, 6, 7, 8, 9, 10]);
      expect(Pagination.pagination(7, 11), [2, 3, 4, 5, 6, 7, 8, 9, 10, 11]);
      expect(Pagination.pagination(7, 12), [2, 3, 4, 5, 6, 7, 8, 9, 10, 11]);
      expect(Pagination.pagination(7, 100), [2, 3, 4, 5, 6, 7, 8, 9, 10, 11]);

      expect(Pagination.pagination(14, 20),
          [9, 10, 11, 12, 13, 14, 15, 16, 17, 18]);
    });
  });
}
上記のソースコードと、それをwidgetに組み込んだものも下記にあります。一番上の画像のようにはまだなってません。
https://github.com/na8esin/flutter2_practice/blob/main/lib/src/pagination
twitterのListsをFlutter webに埋め込んでみる
概要
https://platform.twitter.com/widgets.jsを埋め込んで実現しようとしてます。
なぜLists?
Overview | Docs | Twitter Developer Platform
Because of very low usage, we plan to retire the Likes, Collections, and Moments timelines. We recommended you use the Profile and Lists timelines, which we’re updating to become faster, easier to use, and more up-to-date with Twitter features and functionality.
と書かれていたので。
書いてみたソースコード
import 'dart:html';
import 'dart:ui' as ui;

import 'package:flutter/material.dart';

void main() {
  // ignore: undefined_prefixed_name
  ui.platformViewRegistry
    ..registerViewFactory(
        'hello-html',
        (int viewId) => AnchorElement(
            href:
                'https://twitter.com/na8esin/lists/1438080785391575041?ref_src=twsrc%5Etfw')
          ..className = 'twitter-timeline'
          ..text = 'hello'
          ..style.width = 'auto'
          ..style.height = 'auto')
    ..registerViewFactory(
        'hello-javascript',
        (int viewId) => ScriptElement()
          ..src = 'https://platform.twitter.com/widgets.js'
          ..style.width = '50%'
          ..style.height = '50%'
          ..async = true);

  runApp(MaterialApp(
    home: Scaffold(
      appBar: AppBar(
        title: const Text('hello'),
      ),
      body: ListView(
        children: const [
          SizedBox(
              width: 640,
              height: 640, // 大きすぎるとscriptタグが要素から消える
              child: HtmlElementView(viewType: 'hello-html')),
          SizedBox(
              width: 1.0,
              height: 1.0,
              child: HtmlElementView(viewType: 'hello-javascript')),
        ],
      ),
    ),
  ));
}
一応このコードでも埋め込み自体はできてます。ですがスクロールができない
DivElementとoverflowYを使ってスクロール
SingleChildScrollViewなどを使ってみましたが、うまくいかず。 ちょっと強引ですが、cssでスクロールさせてみました。
import 'dart:html';
import 'dart:ui' as ui;

import 'package:flutter/material.dart';

void main() {
  final anchor = AnchorElement(
      href:
          'https://twitter.com/na8esin/lists/1438080785391575041?ref_src=twsrc%5Etfw')
    ..className = 'twitter-timeline'
    ..text = 'hello hino city';
  // ignore: undefined_prefixed_name
  ui.platformViewRegistry
    ..registerViewFactory(
        'hello-html',
        (int viewId) => DivElement()
          ..style.overflowY = 'scroll'
          ..style.width = '300px'
          ..style.height = '500px'
          ..children = [anchor])
    ..registerViewFactory(
        'hello-javascript',
        (int viewId) => ScriptElement()
          ..src = 'https://platform.twitter.com/widgets.js'
          ..style.width = '50%'
          ..style.height = '50%'
          ..async = true);

  runApp(MaterialApp(
    home: Scaffold(
      appBar: AppBar(
        title: const Text('hello'),
      ),
      body: ListView(
        children: const [
          SizedBox(
              width: 640,
              height: 640, // 大きすぎるとscriptタグが要素から消える
              child: HtmlElementView(viewType: 'hello-html')),
          SizedBox(
              width: 1.0,
              height: 1.0,
              child: HtmlElementView(viewType: 'hello-javascript')),
        ],
      ),
    ),
  ));
}
これで大好きな日野市の情報は見逃さない。
Flutter in_app_purchase をPlay Billing Library 4 で書き換える
Flutterのplugin の in_app_purchaseのandroidの方の実装をPlay Billing Library 4で書き換えました。
GitHub - na8esin/migrate_flutter_in_app_purchase_to_play_billing4
※本文はまだ中途半端
まずはソースダウンロード
DownGitだと何故か落とせなかったので、
svn checkout https://github.com/flutter/plugins/trunk/packages/in_app_purchase
メインのプロジェクトのpubspec.yamlにpathで書く
https://dart.dev/tools/pub/dependencies#path-packages
pathで参照されてるpluginの
javaのコードを変更した時は、flutter runを停止してもう一度起動すれば反映されます。
plugin側のpubspec.ymlのversionを変更してflutter pub upgradeなどをする必要はありません。
dartのコードであれば、plugin側のソースでもhot restartでいけます。
それと、pathでなくても、githubにおいても、packageとして公開してもいいと思います。
削除されたメソッドなどを書き換える
この辺りをよく読む
Google Play Billing Library リリースノート | Google Play の課金システム
background threads で動くようになったものはrunOnUiThread()で囲む
Android Billing 4.0.0 - No purchase result querySkuDetailsAsync() - Stack Overflow
自分が気づいたものは、上記のquerySkuDetailsAsync()とBillingClientStateListener#onBillingSetupFinished()です。 これはflutter側をデバックしてもわかりづらいので気付くのが結構難しいです。
上記の2つは下記で呼ばれるので、
plugins/MethodCallHandlerImpl.java at master · flutter/plugins · GitHub
activity.runOnUiThread()の中に入れることになります。
こんな感じです。
LiveDataでメインスレッドに持ってきてみる
runOnUiThread()だと
プロセスとスレッドの概要 | Android デベロッパー | Android Developers
操作が複雑になるにつれて、この種類のコードも複雑化してメンテナンスが難しくなります。
とのことなので、LiveDataを使ってみます。
バックグラウンド スレッドでの Android タスクの実行 | Android デベロッパー | Android Developers
コードがバックグラウンド スレッドで実行されている場合は、MutableLiveData.postValue() を呼び出して UI レイヤと通信できます。
ということなので。
でもjava.lang.IllegalStateException: Reply already submittedが発生。
このエラーはObserverに複数回通知がいくからです。
対応方法としては、SingleLiveEventなコードにすればいいと思いますが、 そこまでするか?と思ったのでLiveDataは使わない方向で。
断念したところのコミット
GitHub - na8esin/migrate_flutter_in_app_purchase_to_play_billing4 at toLiveData
蛇足
observeの引数には、LifecycleOwnerが必要ですが、
https://developer.android.com/topic/libraries/architecture/lifecycle?hl=ja#implementing-lco
サポート ライブラリ 26.1.0 以降のフラグメントとアクティビティには、すでに LifecycleOwner インターフェースが実装されています。
ということですが、AndroidXを有効にしてるので問題なし。
蛇足2
https://developer.android.com/guide/components/processes-and-threads?hl=ja
↑を見るとAsyncTaskが最善と書いてますが、AsyncTaskのリファレンスを見ると
This class was deprecated in API level 30. Use the standard java.util.concurrent or Kotlin concurrency utilities instead.
となってる。
Executorsはjava.util.concurrentパッケージ。
蛇足3 ViewModelProviderを使うためのviewModelStoreの取得方法がわからなかった
普通のAndroidアプリだとAppCompatActivityから取れるんで問題ないですが、 ActivityAwareからは取れません。
時間に余裕がある時にまた調べたい。
蛇足4 onMethodCallはUiThreadでしか呼べない
BillingClient.queryPurchasesAsync()を使える様にする
このコミットで自分のやりたいことはとりあえずできました。
queryPurchasesAsyncに変えると、アプリが起動したままで定期購入の有効期限が切れた場合に flutter側から呼び出すことで最新の情報が取得できました。
余談
registerWith()
registerWith()を使うのが古いみたいだけど
https://medium.com/flutter/modern-flutter-plugin-development-4c3ee015cf5a
最近はflutte createしてもregisterWith()は生成されない
Reply already submitted with simultaneous method calls
LiveDataを使ってみた時にこれが発生して下記のissueに辿り着きましたが、 今は同じ様にやっても再現できなかったです。
https://github.com/flutter/flutter/issues/29092
参考
ClassyTaxiのbilling libraryをv4に変えたとき
https://github.com/android/play-billing-samples/commit/27fbd2e113cf74c446a01e2f3b700d0380bd281d
firestore security ruleの知識を棚卸し
ドキュメント
- https://firebase.google.com/docs/rules?hl=ja
- Cloud Storage のセキュリティールールも一緒に見れる
- 属性ベースのアクセスとロールベースのアクセス
- https://firebase.google.com/docs/firestore/security/overview?hl=ja
- https://firebase.google.com/docs/firestore/solutions/role-based-access?hl=ja#data_structure
- 文書作成コラボレーションアプリ
- https://cloud.google.com/firestore/docs/security/get-started?hl=ja
- google cloudのドキュメント
- https://firebase.google.com/docs/reference/rules/rules
- API Reference
- The Firebase Blog
サンプルコード
- https://github.com/firebase/quickstart-testing/tree/master/unit-test-security-rules
- https://github.com/FirebaseExtended/codelab-rules/blob/main/final-state/firestore.rules
- https://github.com/firebase/friendlyeats-web/
roleの設計
カスタムクレームをつかう
get()などで発生するコストがかからない
でもfunctions(admin sdk)じゃないと変更できない
チャットアプリのような場合だと、ルームのメンバーの権限をそこそこ変えることがありそうだが、
反映させる場合はidtokenを取得しなおさないといけないから若干手間
https://firebase.google.com/docs/auth/admin/custom-claims?hl=ja#propagate_custom_claims_to_the_client
※クライアントへカスタム クレームを伝播する
ただ下記の様な方法もあるから全てをカスタムクレームで済ませる必要はなさそう
https://firebase.google.com/docs/firestore/solutions/role-based-access?hl=ja
カスタムクレームを使わない
firestoreのどこかに保存する
この場合は、roleを確認するのにget()しないといけないのでコストがかかる
アクセス呼び出しと料金 https://firebase.google.com/docs/firestore/security/rules-conditions?hl=ja#access_calls_and_pricing
案1. usersのフィールドにrolesを持たせる
users/user_abc {
  fcmTokens:[]
  roles : [commenter, editor]
}
- アプリ側でrolesを使わないような場合は、モデルがアプリと管理画面で別々になる
- セキュリティールール
'editor' in get(/.../users/uid).data.roles- アプリ側で間違ってsetした時エラーにしないといけない。そうしないとフィールドが消える
- flutter側。例えば管理画面で更新ボタンを表示・非表示する場合。後で記述するパターンと比べるとnullチェックが多め
isEditor() async {
   final snap = await FirebaseFirestore.instance.doc('users/user_abc').get();
   final data = snap.data();
   if (data == null) return false; // ここがnullなことはほとんどないと思うけど念の為
   final List? roles = data['roles'];
   if (roles == null) return false;
   return roles.contains('editor');
}
上の様なコードを下記の様なボタンの出しわけで使う想定
if (user.isEditor())
  ElevatedButton(onPressed: () => db.update, child: Text('更新'));
案2. usersのサブコレクションにrolesを持たせる
collectionGroup()しないならメリットが思いつかない。 collectionGroupでwhere検索する場合はインデックスを作成しないといけない(沢山作ると料金が発生)。 ただ、そんなケースがあるのか?
users/user_abc/roles/role {
  editor: true,
  reader: true
}
- セキュリティルール
get(/.../users/uid/roles/role).data.editor - クライアント側のコード
isEditor() async {
  final snap =
      await FirebaseFirestore.instance.doc('users/users_abc/roles/role').get();
  return snap.data() != null && snap.data()!['editor'] == true;
}
案3. usersのサブコレクションにrolesを持たせ、ドキュメントIDはrole名
users/user_abc/roles/editor:{
  isAvailable: true
}
users/user_abc/roles/commenter:{
  isAvailable: true
}
いろいろやってみましたが、メリットなさそう。
案3. rolesコレクションを作って、ドキュメントIDはUID
roles/uid {
  editor: true,
  reader: true
}
- セキュリティルール
get(/.../roles/uid).data.editor - クライアント側
isEditor() async {
    final snap = await FirebaseFirestore.instance.doc('roles/user_abc').get();
    return snap.data() != null && snap.data()!['editor'] == true;
  }
なかなか悪くない。usersが巨大化したら分けるのもあり。
その他
最近powershellから起動しているせいかセキュリティールールを更新しても読み込んでくれない時がある。 その場合は、一旦停止してから、再度起動。
rules-unit-testingが2.0.0から大きく変わる
initializeAdminApp()がなくなる。結局内部はadmin sdkなので自分で作りだせはする。
v1系ではまだ存在する
firestore arrayUnionを使ってupdateする
firestoreにarrayの配下にmapがあるようなフィールドをupdateするときに、 プロジェクトのメンバーが複雑な分岐処理を書いていたので、 arrayUnionで簡単になるんじゃない?と思い調べました。
最初メンバーが書いていたコードはこんな感じです。 firestore_refを使ってるので、本当はちょっと違いますが。 あと、テストしてないので、動くかわからないです。
  updateFcmTokens(device, token) async {
    final newFcmToken = {
        "device": device, "token": token
    };
    // まずはusersの特定のドキュメントを取得
    final userDoc = FirebaseFirestore.instance
        .collection('users')
        .doc('uid');
    final snap = await userDoc.get(); // 本当はstreamで取りたい
    final user = snap.data();
    if (user == null) return; // これは例外的なケース
    final fcmTokens = user['fcmTokens'] as List<Map>;
    if (user['fcmTokens'] == null) {
      userDoc.update({
        'fcmTokens': [newFcmToken]
      });
    } else {
      // 同じものがないか調べる
      final isUpdate =
          fcmTokens
              .where((fcmToken) => fcmToken['token'] == token)
              .isEmpty;
      if (isUpdate) {
        // 同じものがない場合は更新

        // ここのaddも冗長
        fcmTokens.add({
            'token': token,
            'device': device});
        userDoc.update({'fcmTokens': fcmTokens});
      }
    }
  }
こういう時はまず、自分の場合はadminSDKで同じことができるならそっちで検証します。 ちょっと長いので、こちらに置いてあります。
firebase-practice/array_map_update.ts at main · na8esin/firebase-practice · GitHub
ちょっと前に書いたarrayRemoveの検証に似てます。
adminSDKで試してみて、使い方がわかったので、flutterのソースをこんな感じで直しました。
// tokenはログインのタイミングなどでFirebaseMessaging.getToken()した値
updateFcmTokens(device, token) async {
    final fcmToken = {"device": device, "token": token};
    userDoc.update({"fcmTokens": FieldValue.arrayUnion([fcmToken])});
}
単純に書き直すならこれだけでいいと思います。 同じものがある時は、何も追加されずに更新もされないので。 リクエストする回数も最大で1回(get)ありましたが、こちらも1回です。
ただ、ログイン時に必ず、最近保存したfcmTokenをusersなんかと一緒に、firestoreから 取得しているような場合は、FirebaseMessaging.getToken()したときに、 同じものかどうか比較して、余計なupdateを防いでもいいかもしれません。
久しぶりにwindows10でflutterやろうとしたら動かない。firebaseも
pubspec.yamlに書いてあるdartのバージョンの問題
flutter upgrade
flutter doctor --android-licenses が失敗する
java.lang.NoClassDefFoundError: javax/xml/bind/annotation/XmlSchema
というエラーが出る。解決策は下記だそうで。
ただ、Arctic Foxが正式リリースになってたので、試しにupdate。
再びflutter doctor --android-licensesするとエラーは解消したが警告が出力された
PS>flutter doctor --android-licenses
Warning: Observed package id 'extras;intel;Hardware_Accelerated_Execution_Manager' in inconsistent location 'C:\Users\t.watanabe\AppData\Local\Android\Sdk\extras\intel\Hardware_Accelerated_Execution_Manager-2' (Expected 'C:\Users\t.watanabe\AppData\Local\Android\Sdk\extras\intel\Hardware_Accelerated_Execution_Manager')
Warning: Already observed package id 'extras;intel;Hardware_Accelerated_Execution_Manager' in 'C:\Users\t.watanabe\AppData\Local\Android\Sdk\extras\intel\Hardware_Accelerated_Execution_Manager'. Skipping duplicate at 'C:\Users\t.watanabe\AppData\Local\Android\Sdk\extras\intel\Hardware_Accelerated_Execution_Manager-2'
All SDK package licenses accepted.======] 100% Computing updates...
とりあえず、様子見
wslを無効化する
Intel HAXMを有効化できるようにするため。
android開発だけ行うPCであれば、wslはいらないだろうけど、 api用のサーバも一緒に動かすとなるとかなり面倒。
そうなると、android開発もmacでやった方がいいと言うことになる。
firebase admin sdkを利用できるようにする環境変数
powershellで設定
[Environment]::SetEnvironmentVariable('GOOGLE_APPLICATION_CREDENTIALS', 'C:\somepath\google-services.json', 'Machine')
Android Studioのjavaを使う
C:\Program Files\Android\Android Studio\jre\binにパスを通す
flutter build appbundleでエラーが発生
FAILURE: Build failed with an exception.

* What went wrong:
Execution failed for task ':app:extractReleaseNativeSymbolTables'.
> NDK is not installed

* Try:
Run with --stacktrace option to get the stack trace. Run with --info or --debug option to get more log output. Run with --scan to get full insights.

* Get more help at https://help.gradle.org
ndkVersionのバージョンの問題。
build.gradleに書かれている方が古かったので、SDK Managerに乗ってるバージョンをそのままコピペ。 この辺りの設定もパソコンが変わると注意しないといけない。
vscodeのdebug consoleが文字化けする
こういうところもwindowsで、flutter開発が向いてないところだと思います。
環境変数にJAVA_TOOL_OPTIONSを設定。下記を参考にしました。-Dfile.encoding=UTF-8 -Dsun.jnu.encoding=UTF-8を設定します。
http://umezawa.dyndns.info/wordpress/?p=5801


No toolchains found in the NDK toolchains folder for ABI with prefix: arm-linux-androideabi
とりあえず、ndkをすべて削除。でも最新だけ残って、それで動くようになった。
ndkが何故か中途半端に消えてた
build中にエラーが発生し、
* What went wrong:
Execution failed for task ':app:stripDebugDebugSymbols'.
> NDK at C:\Users\t.watanabe\AppData\Local\Android\sdk\ndk\23.0.7599858 did not have a source.properties file

* Try:
Run with --stacktrace option to get the stack trace. Run with --info or --debug option to get more log output. Run with --scan to get full insights.

* Get more help at https://help.gradle.org

BUILD FAILED in 36s
Running Gradle task 'assembleDebug'...                             38.6s
Exception: Gradle task assembleDebug failed with exit code 1
android studio見て、なんか消えてるなと思って、再インストールしたらこんな状況。 -2がついてない方はほとんど空だったので、-2の方をリネームして利用したらビルドできるようになった。
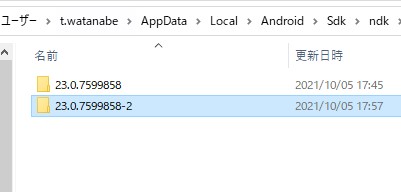
一つ上のところで、全削除したことが影響なのか。。。
Integrate a Flutter module into your Android project(Arctic Fox)
とりあえず、起動はできたがArctic Foxだとスムーズにはいかない
新しくプロジェクトを作って、flutter_moduleを追加してgradle sync
下記エラーが発生
Caused by: org.gradle.api.internal.plugins.PluginApplicationException: Failed to apply plugin class 'FlutterPlugin'.
stackoverflow
android - PluginApplicationException: Failed to apply plugin class 'FlutterPlugin' - Stack Overflow
Arctic Foxで新規作成した時のgradleのバージョンとflutterが適合するバージョンが違う模様
Could not find method dependencyResolutionManagement()
ダウングレードすると今度はメソッドが見つからない
Settings file '/Users/takayuki/AndroidStudioProjects/FlutterIntoAndroid/settings.gradle' line: 3

A problem occurred evaluating settings 'FlutterIntoAndroid'.
> Could not find method dependencyResolutionManagement() for arguments [settings_attxq7gxzoa167j848a5dg0iu$_run_closure1@7de31858] on settings 'FlutterIntoAndroid' of type org.gradle.initialization.DefaultSettings.

* Try:
Run with --info or --debug option to get more log output. Run with --scan to get full insights.

* Exception is:
org.gradle.api.GradleScriptException: A problem occurred evaluating settings 'FlutterIntoAndroid'.

中略

Caused by: org.gradle.internal.metaobject.AbstractDynamicObject$CustomMessageMissingMethodException: Could not find method dependencyResolutionManagement() for arguments [settings_attxq7gxzoa167j848a5dg0iu$_run_closure1@7de31858] on settings 'FlutterIntoAndroid' of type org.gradle.initialization.DefaultSettings.
arctic-foxからDependencyResolutionManagementがsettings.gradleに追加されるようになった
https://androidstudio.googleblog.com/2021/02/android-studio-arctic-fox-canary-7.html
DependencyResolutionManagementはいつから?
DependencyResolutionManagement (Gradle API 7.2)
6.8から
ちなみにgradle release一覧 Gradle | Releases
flutter_toolsのソースを眺める
この辺りをウォッチングしておけばいい?
flutter createのテンプレートは下記
dependencyResolutionManagementのブロックを削除
repositoriesの設定をしているだけのように見えるので削除
dependencyResolutionManagement {
    repositoriesMode.set(RepositoriesMode.FAIL_ON_PROJECT_REPOS)
    repositories {
        google()
        mavenCentral()
        jcenter() // Warning: this repository is going to shut down soon
    }
}
そうすると下記のエラーが発生
FAILURE: Build completed with 9 failures.

1: Task failed with an exception.
-----------
* What went wrong:
Execution failed for task ':app:mergeDebugResources'.
> Could not resolve all files for configuration ':app:debugRuntimeClasspath'.
   > Could not find org.jetbrains.kotlin:kotlin-stdlib-jdk8:1.5.20.
     Searched in the following locations:
       - https://storage.googleapis.com/download.flutter.io/org/jetbrains/kotlin/kotlin-stdlib-jdk8/1.5.20/kotlin-stdlib-jdk8-1.5.20.pom
     If the artifact you are trying to retrieve can be found in the repository but without metadata in 'Maven POM' format, you need to adjust the 'metadataSources { ... }' of the repository declaration.
     Required by:
         project :app
基本に立ち戻ってsamplesを見る
https://github.com/flutter/samples/tree/master/add_to_app
プロジェクトのbuild.gradleにallprojects.repositoriesがないことに気づいて追加。そうするとビルドが成功してアプリが立ち上がるようになった。
でも、まだflutterのコードと連携できるようにはなってない。